
关注点:
版本、VC运行环境
一、apache环境
1. 下载
下载链接:http://httpd.apache.org/docs/current/platform/windows.html#down
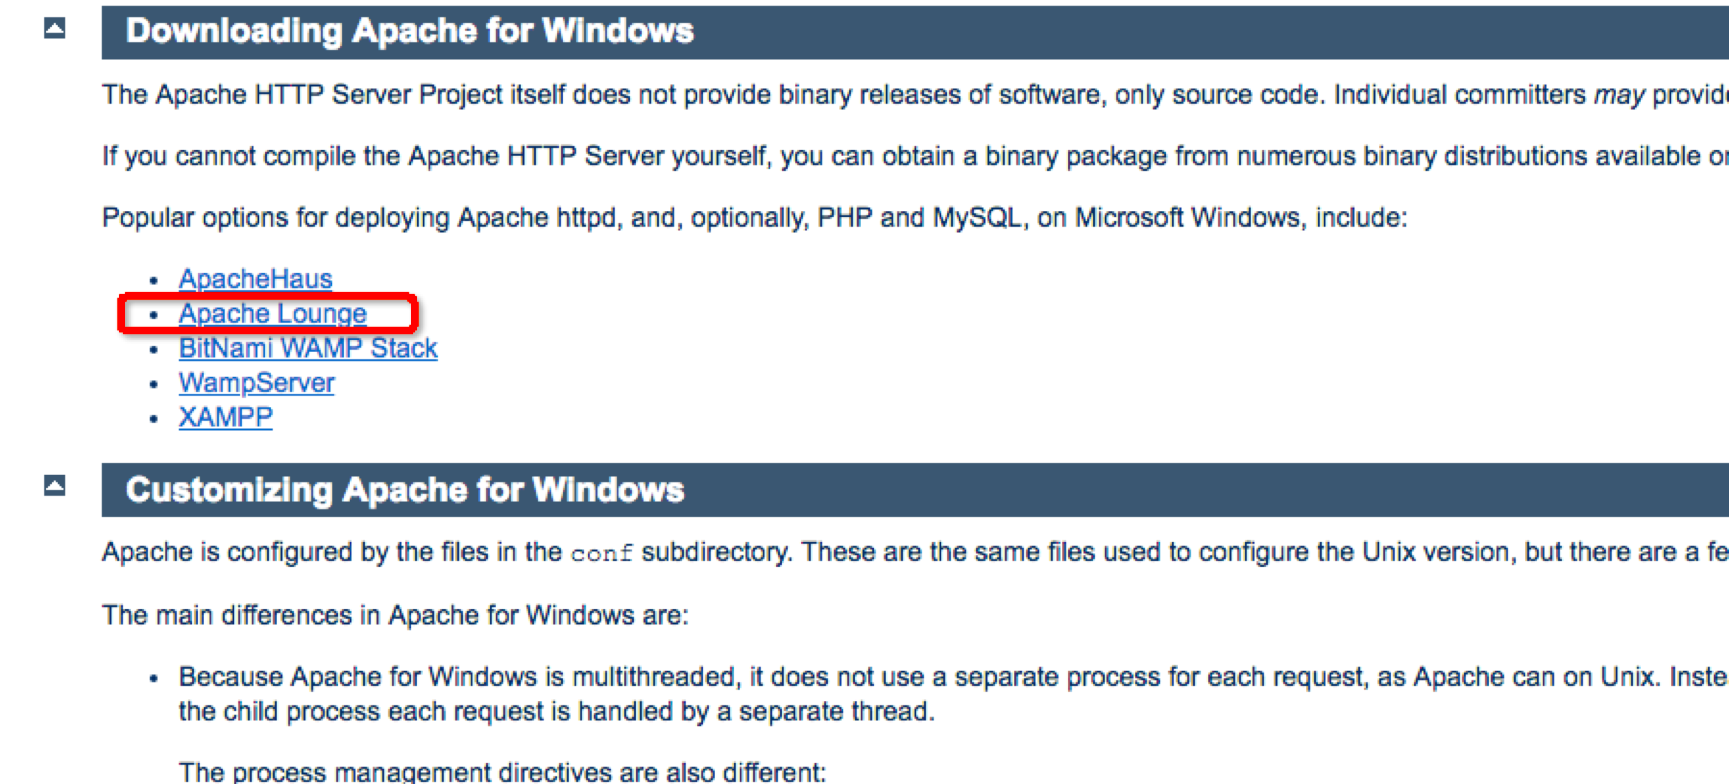
image.png
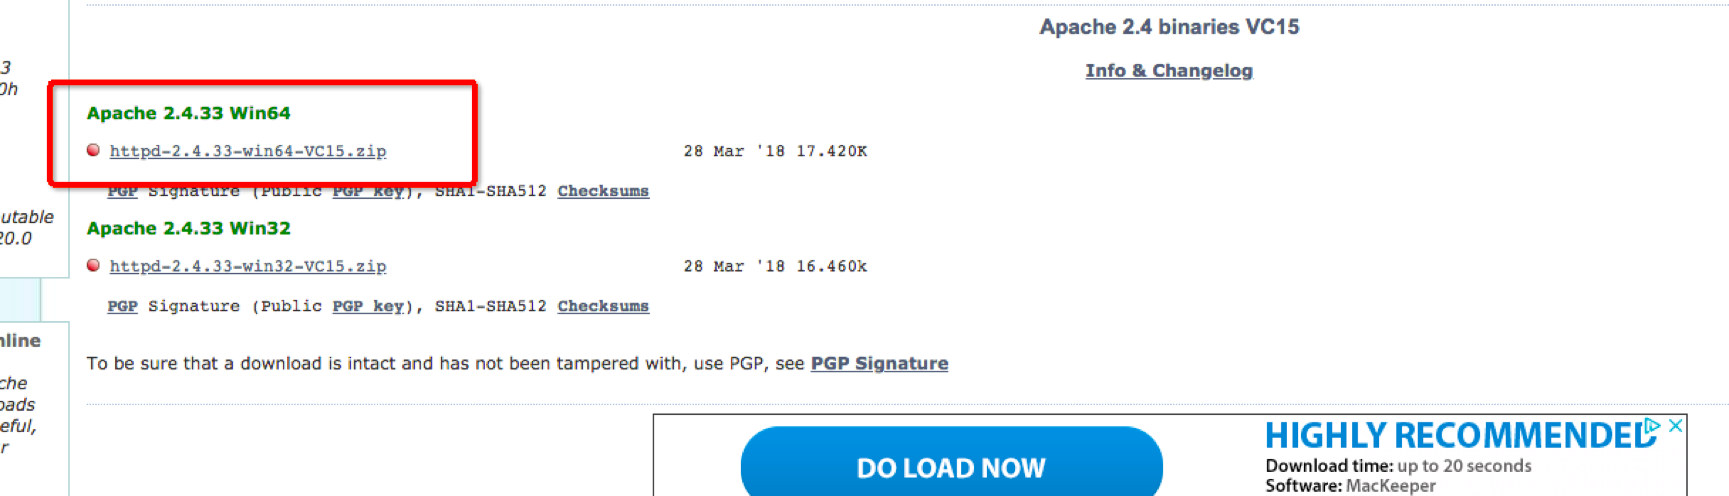
image.png
下载Apache 2.4.33 Win64(操作系统位数)
2. 解压,修改配置

image.png
修改conf/http.conf文件如下:
#Listen 12.34.56.78:8080
Listen 172.16.54.139:8080

ServerRoot "c:/Apache24"
DocumentRoot "c:/Apache24/htdocs"
这里关注Root的设置,将Root修改为实际的安装目录。
3. 安装、启动apache
httpd -k install
httpd -k start
一切顺利,打开localhost,则可以看见It Works的页面,apache配置完成。
二、php环境
1. 下载
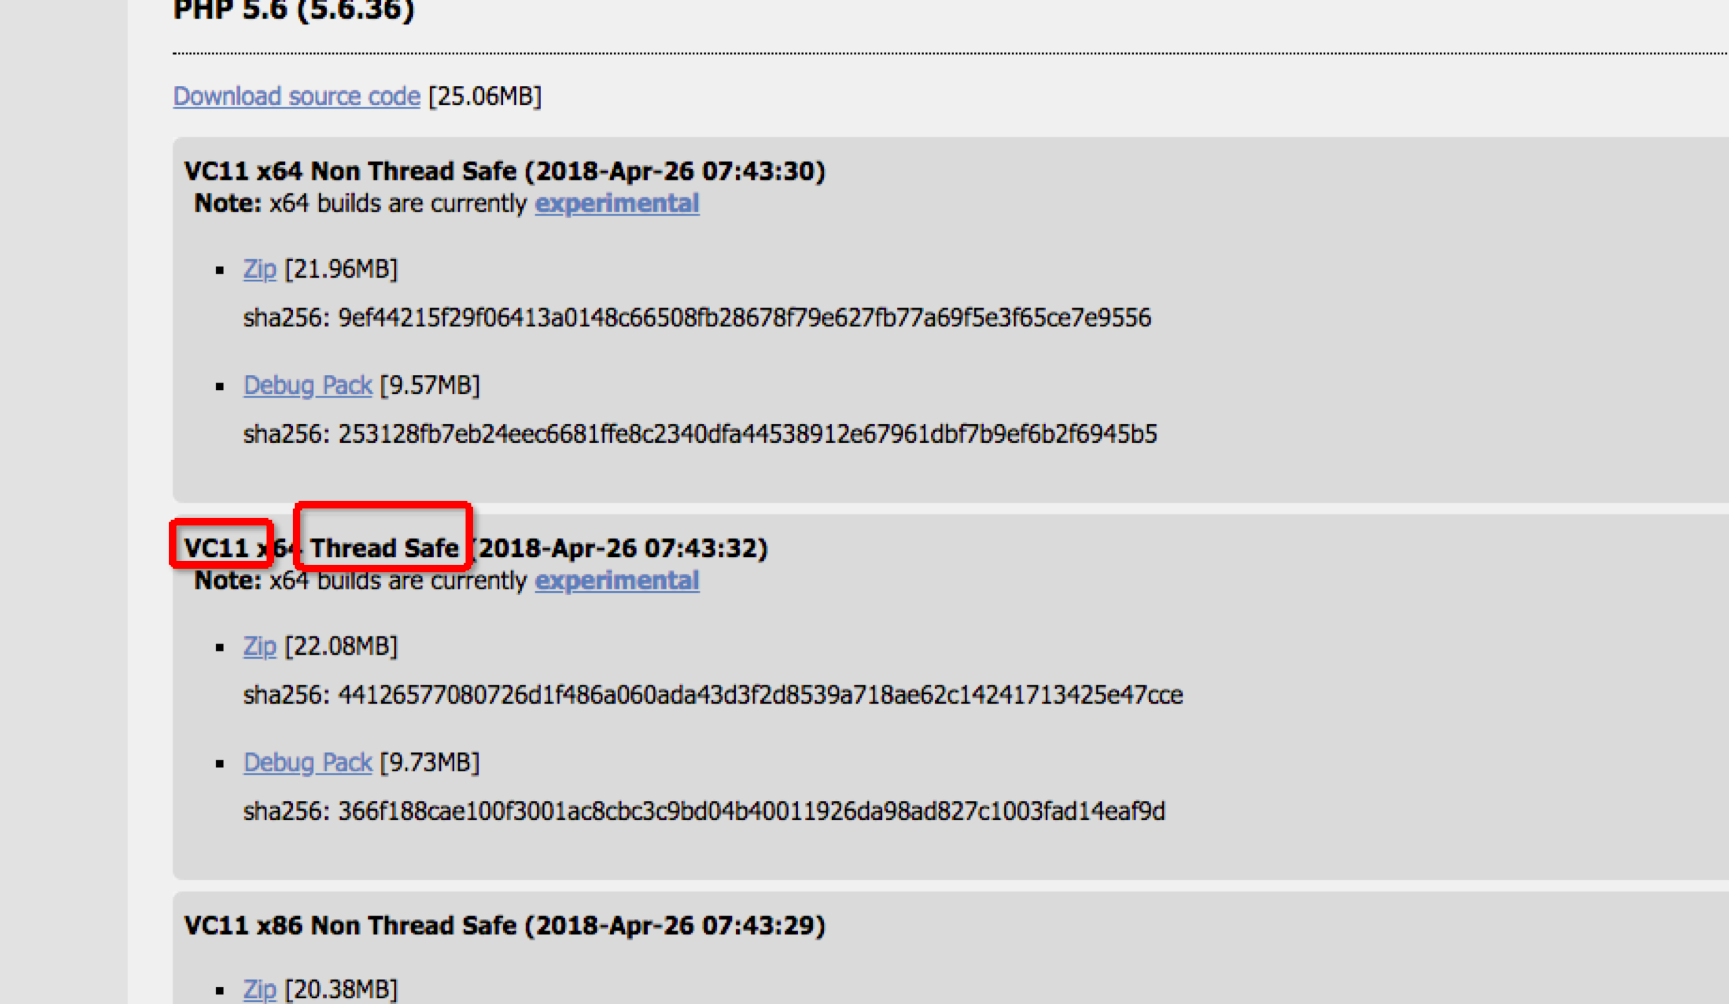
image.png
注意VC11,表示php的模块的dll是使用VC11编译的,所以需要有VC11的运行环境。如果没有VC11的运行环境,Apache将启动失败。
2. 配置
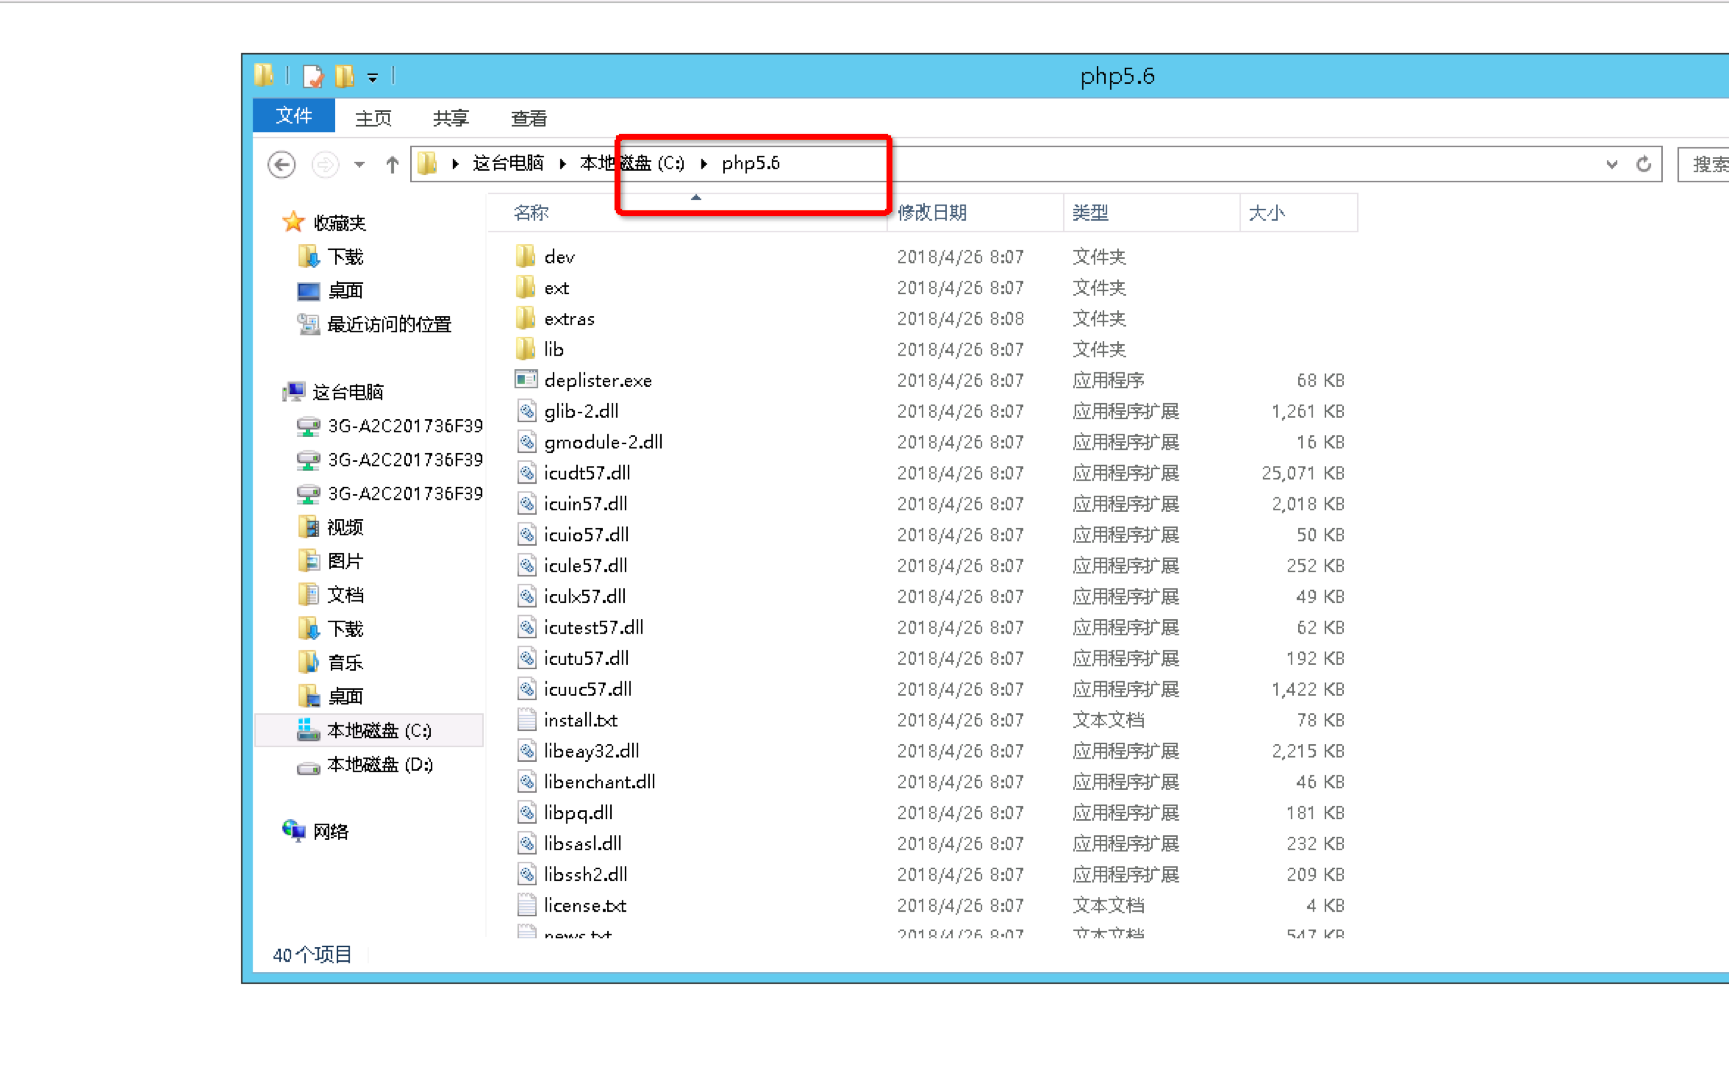
image.png
将目录下的php.ini-production 拷贝为php.ini文件。修改文件,将使用到的扩展文件的注释删除。
extension_dir = "C:/php5.6/ext"
extension=php_curl.dll
extension=php_gd2.dll
extension=php_mbstring.dll
extension=php_mysql.dll
extension=php_mysqli.dll
修改apache http.conf文件添加http支持。
PHPIniDir "C:php5.6"
LoadModule php5_module "C:php5.6php5apache2_4.dll"
AddType application/x-httpd-php .php .html .htm
3. 重启apache
. 缺少VC11的运行环境
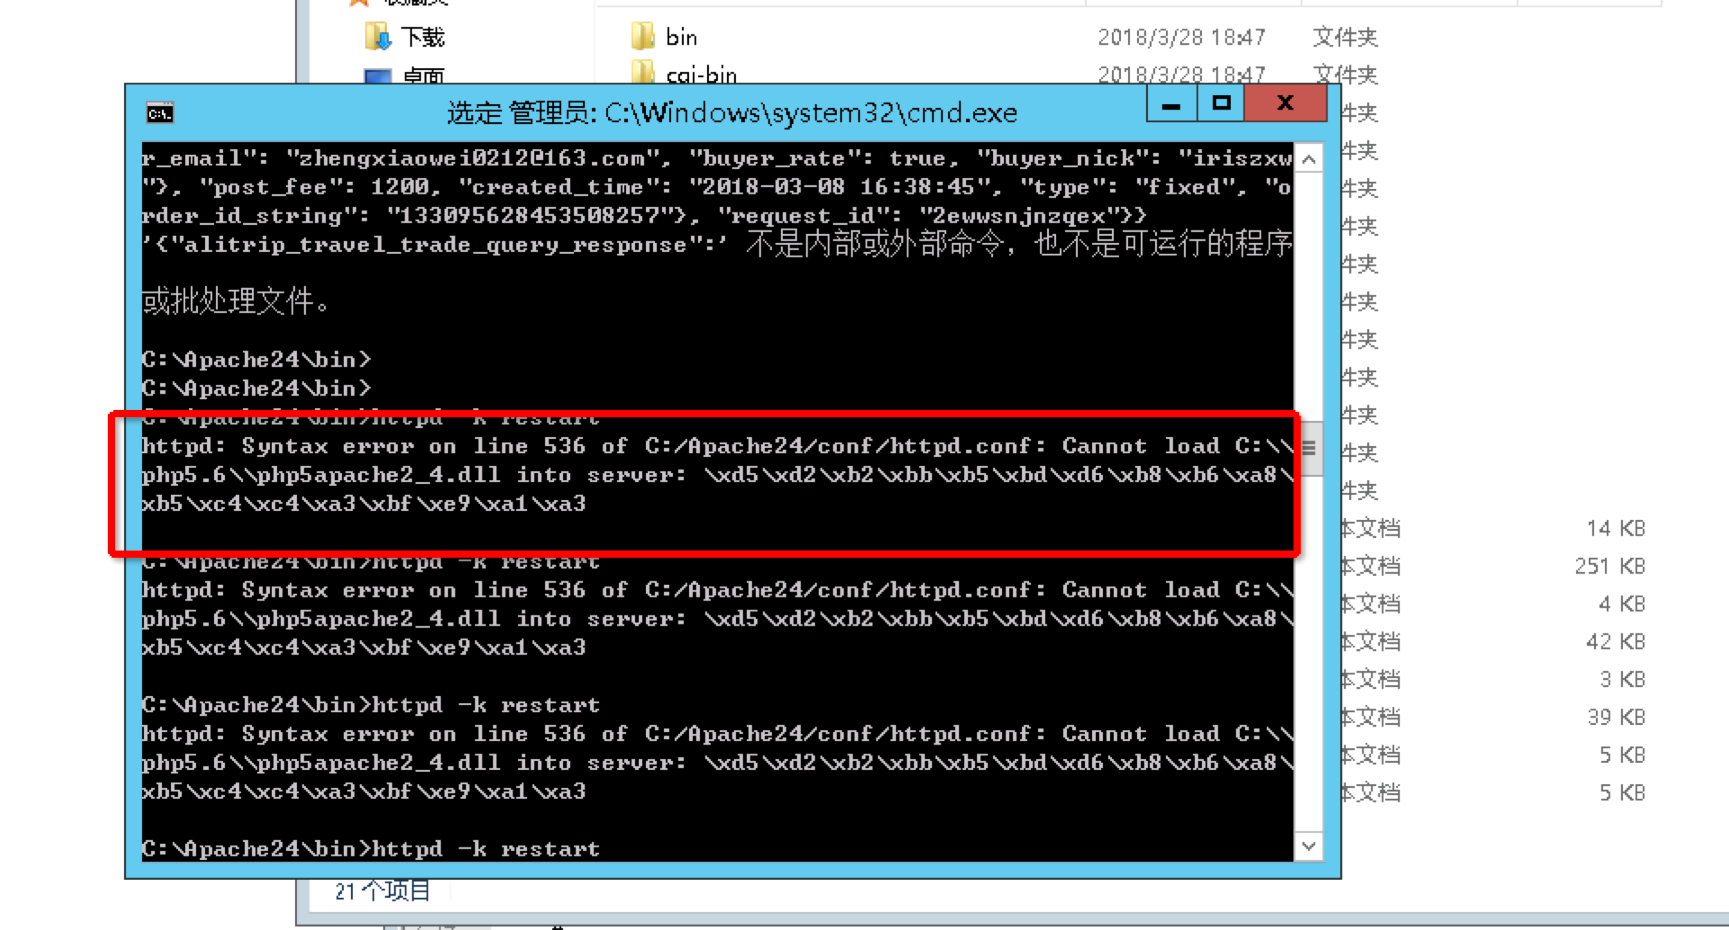
image.png
可能会报如下的错误,错误的原因是,php5apache2_4.dll是VC11编译的(下载版本决定),而当前系统并没有VC11的运行环境,所以导入失败。
. VC11运行环境。百度搜索VC11运行环境,下载如下程序
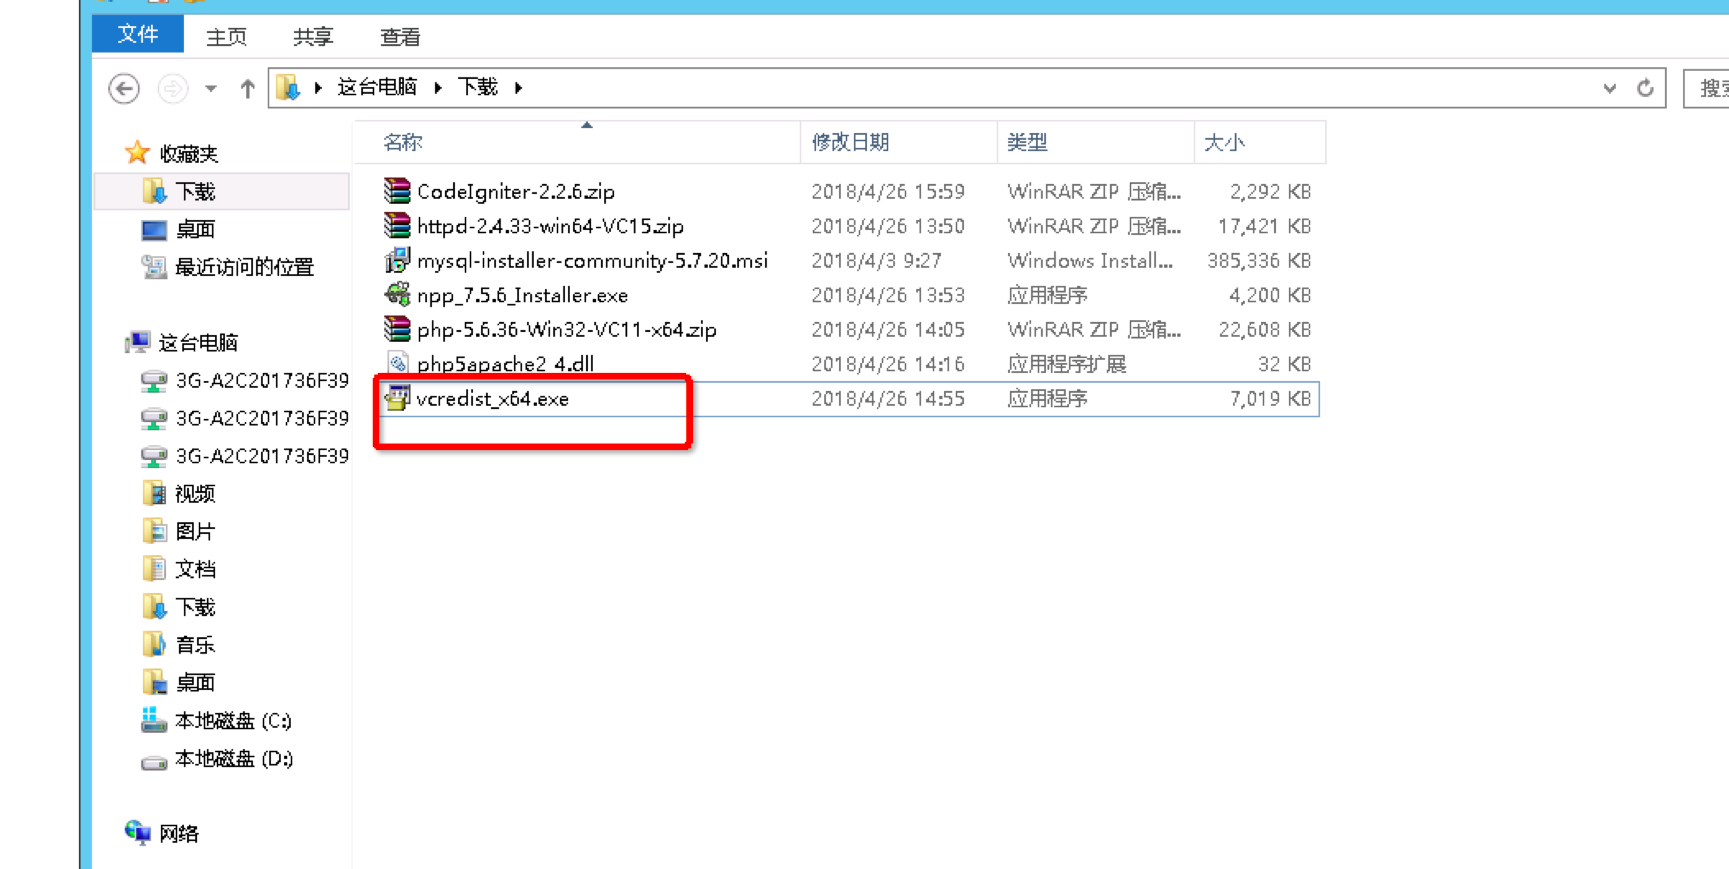
image.png
. 重启apache,ok
. 在C:Apache24htdocs (apache root目录)中新建index.php,内容如下:
. localhostindex.php显示phpinfo界面则OK


评论前必须登录!
注册